Advanced Portal and Hinting Optimization Tutorial
By ObsidianThis article was originally posted at Quake3World. It is being duplicated here because the old image host died.
Well ideally, the portal viewer is supposed to be useful for you to try to optimize your map portals. By allowing you to visualize where the actual portals are being generated, it gives you a chance to see areas that may need some optimization. You do this by changing stuff to detail/structural as well as by adding in hint brushes. Ultimately, you want to create new portals that limit the PVS while getting rid of portals that aren't doing anything.
Portals are generated more or less randomly, so sometimes the order in which they were created yields different results. Also, it doesn't always create them in the most optimized manner. You can split up a room in multiple ways, but how these are split often make the difference between a large number of useless portals and a small number of optimized portals.
First of all, try to convert as much of those small brushes to detail. This simplifies the portals the most. Then add a few hint brushes to limit the PVS in places like hallways between rooms and such. There are a bunch of hinting tutorials around that will teach you where to put these. Then look for portals that aren't doing anything with regards to the PVS and use hints to try to remove those.
Keep in mind that the blocksize also generates portals every 1024 game units along every axis. You can increase/decrease the size of this by adding the _blocksize worldspawn entity key/value pair. You can also set it to 0 to disable if you're comfortable to generate your own portals - though you should avoid this unless you really know what you're doing. When building your layout, you may want to build your floorplan keeping the blocks in mind.
If I have the time in the next few days, maybe I'll throw together a few screenshots from my current alpha to illustrate. I have one room that I spent quite a bit of time optimizing that I think will explain this very well.
First off, I suggest that you read the following tutorials and articles before we start because they will give you a basic foundation of BSP, portal and hinting knowledge that you will need to understand this tutorial. If you've read them before, read them again to refresh your memory. If you're reading them for the first time, make sure you fully understand them because they are some of the best map optimization guides ever written. After all, this tutorial isn't so much to teach you how to hint and limit the PVS as it is to teach you how to optimize the portal volumes. (Sucks that some of these screenshots are disappearing)
Right... now that you've learned about the concepts, lets go through a practical 3-dimensional example taken from the alpha of my current map under development. The reason I'm using this section of my map is because:
- Fjoggs asked for a portal-viewer plug-in discussion which is perfect timing for me because I just happened to be using the portal-viewer to optimize my current map.
- This particular room was designed with hinting in mind so I was able to integrate the structural hull with the hints to maximize the effectiveness of the portals and PVS.
- When finished, this room will likely contain a large number of highly detailed elements (working on a few high-poly models) that I don't want to be able to see from other rooms in the map - so I'm planning ahead and isolating it in it's own PVS.
- This room contains 2 floors, some hallways and some interesting turns which will make it interesting for those of you who are tired of the basic L or Z-shaped hallway hinting examples (but keep those basic examples in mind - they're still here, just less apparent).
Notes:
I disabled the blocksize for this map simply because it suits me for the rest of the map. While this can reduce the number of portals created, it's generally not recommended that you do this on your map unless you know what your are doing. When creating the layout of your map, keep the blocksize in mind and build accordingly. Also, since this map is just in the alpha phase, the brush building concepts that I'm using are less than optimized... I'll be fixing this as I move towards beta so ignore that. The hints are what counts and I spent quite a bit of time optimizing them.
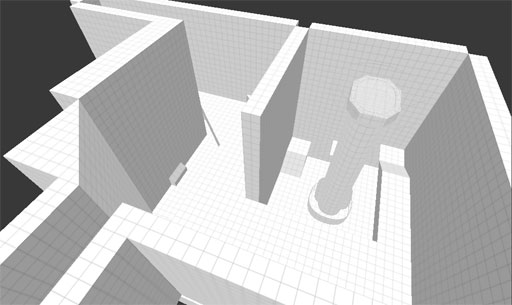
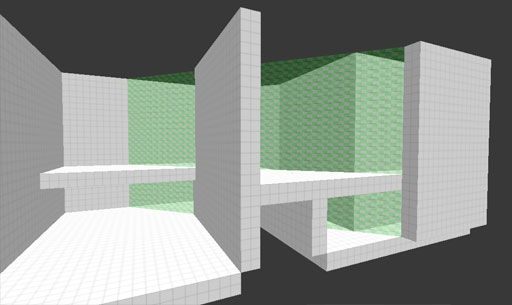
Here's the room in question. There are actually two hallways extending beyond that actually lead to the rest of my map, but I've sealed them off here to prevent leaks.
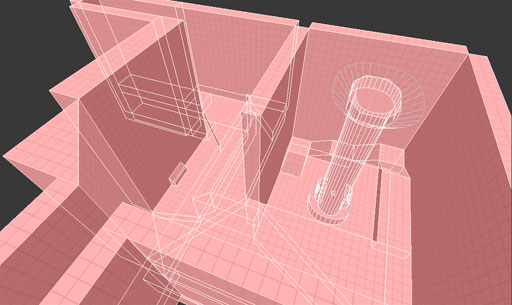
In wireframe.
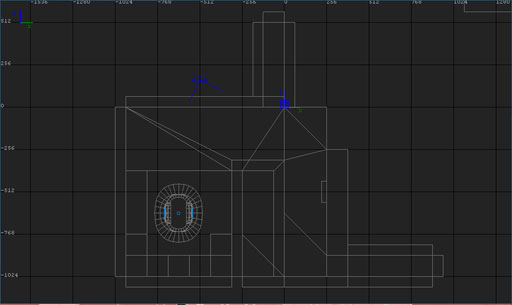
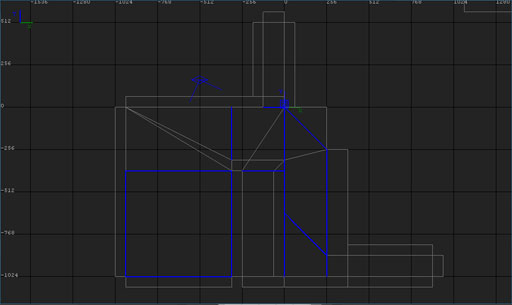
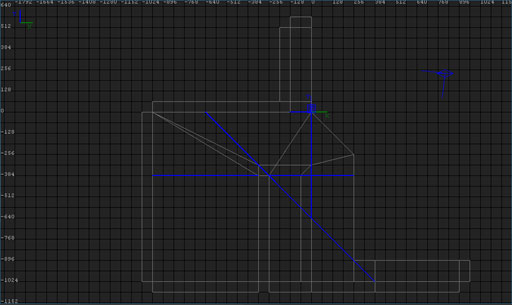
And again from the XY-view.
From here on, I'll be making good use of the Portal Viewer plug-in in GtkRadiant. It's really a great tool for optimizing the PVS and portal volumes in a map.
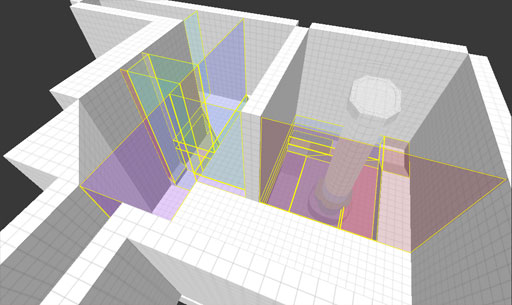
After compiling vis, I loaded up the .prt file and you can see all the portals generated. There's a lot of them because all the brushes were left as structural. This is a simple block alpha, imagine the number of portals generated if this were a full blown map with all the details and trim. The number of portals would be unimaginable, which is why an optimized map should only take a few seconds to compile the vis stage while an unoptimized map could take hours.
Here are the portals from the XY-view.
Of course, the first step is to convert brushes that aren't useful for vis calculations to detail. Here, I've hidden all patch meshes and converted all unnecessary brushes to detail and then filtered them. Only structural brushes remain.

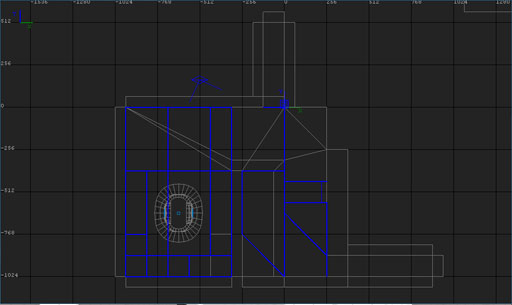
Recompiling and then reloading the .prt, you can see that already there's a large difference in the number of portals generated.
From another angle.
And from the XY-view.
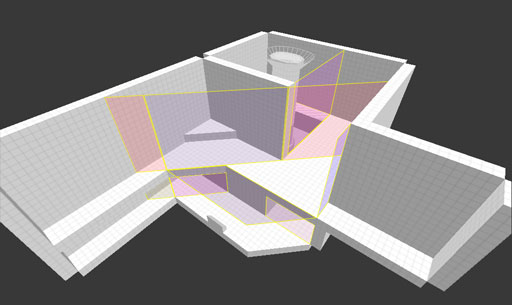
To limit the PVS, I'm going to add a single brush textured with skip on all sides except for one face which is textured with hint.
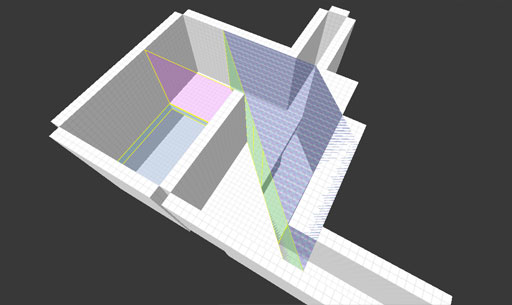
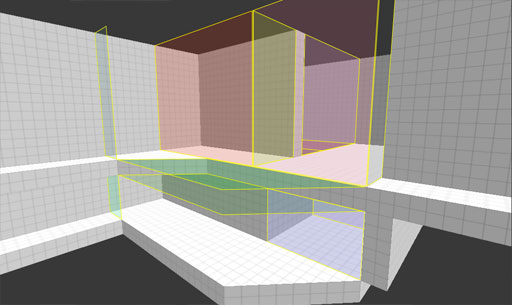
From another angle, you can see that this hint brush extends between both floors. In the planning stage, I built the structural brushes in a way that I would only need 1 brush for both floors, simplifying the process.
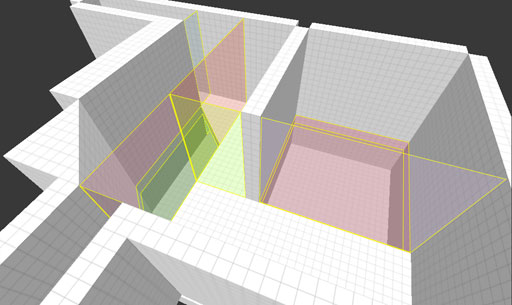
In this diagram, the green line represents the hinting plane. The red section is the bottom floor, the blue section is the top floor. The purple region are parts of the map where the top and bottom floors overlap.

Lets look at the bottom floor first. You'll notice that when looking at the first floor, it's not anymore complex than those general examples listed in the links above. That's because no matter what, hinting concepts always breaks down to the basics. The most complex examples are only deceivingly so and when looked at in sections, they are actually quite basic. You'll notice that this floor is actually just a Z-shaped hallway.
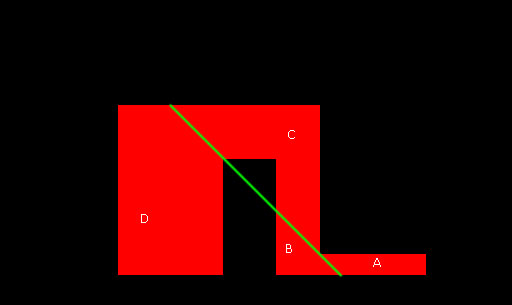
- Player A can't see areas C and D
- Player B can't see area D
- Player C can't see area A
- Player D can't see areas A and B
On the second floor, I'm using the same hint brush. Again, this is a basic Z-shaped hallway.
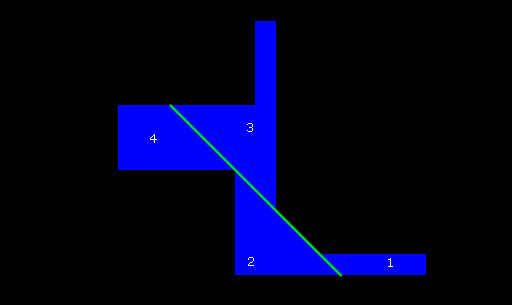
- Player 1 can't see areas 3 and 4
- Player 2 can't see area 4
- Player 3 can't see area 1
- Player 4 can't see areas 1 and 2
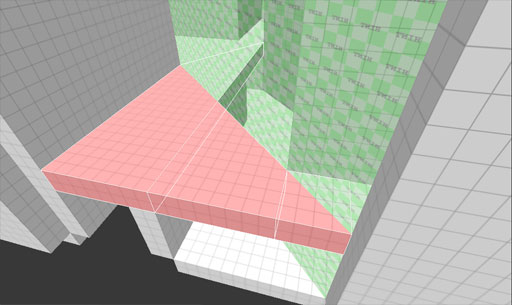
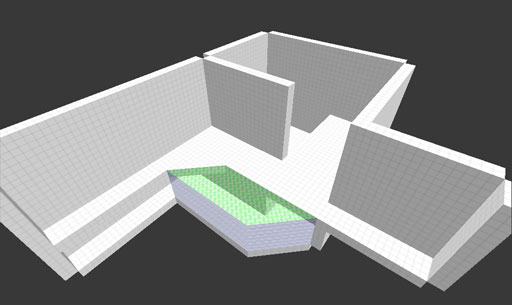
In planning the layout of the map, you can see here how I deliberately created the selected triangular section of floor to conform to the hint brush. Small changes to your map like this can simplify your hinting issues while creating some interesting architectural elements. A square floor would not only be boring, but it would have made hinting this section much more difficult. I would probably have had to use multiple hint brushes to achieve the same result.
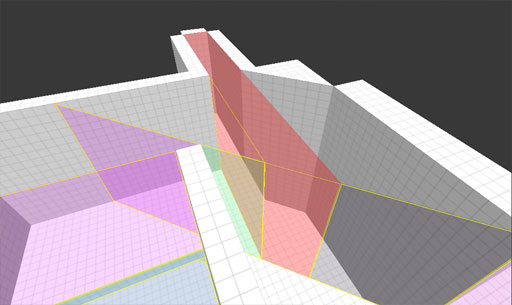
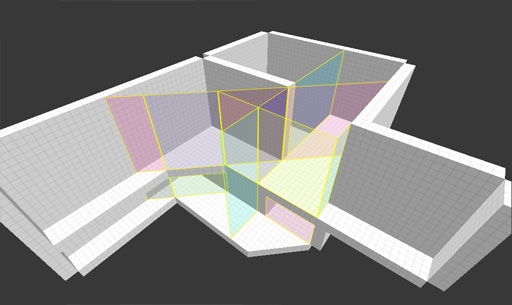
Portal volumes are created pretty much randomly and as you can see here, this volume extends quite a bit further than the hallway and well into the room. The Portal Viewer really helps in finding these awkward portals so that we can get rid of them.
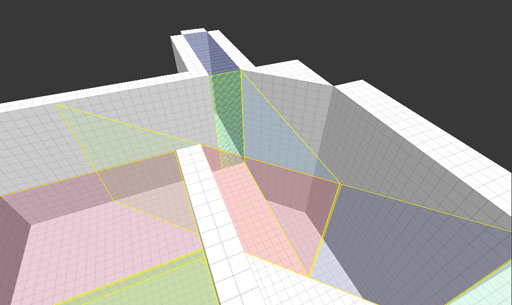
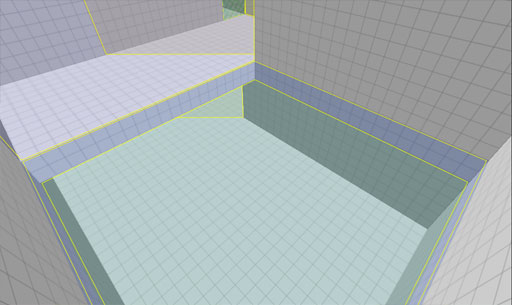
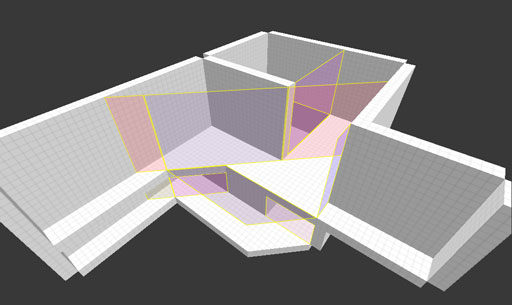
Remember that all portal volumes are convex. So we want to rearrange the volumes into basic convex shapes. Recompiling with a small hint plane in the doorway prevents the portal from extending into the room. As you can see, there is now a large triangular convex volume in place of the awkward volume sticking out of the hallway.
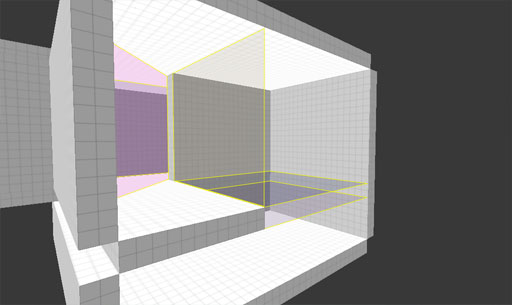
Here's another problem area. The balcony is creating a portal between floors, which isn't doing much for the PVS.
From another angle, you can see that there are 3 separate portal volumes in that room, each stacked on top of each other.
So we'll add another hint plane here.
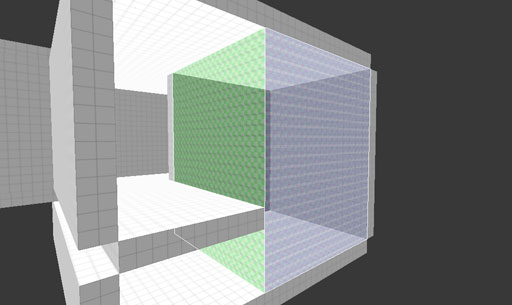
This creates a single volume in that room instead of 3. As well, this has the potential of culling the bottom floor from view when the player is standing on the second floor and vice-versa.
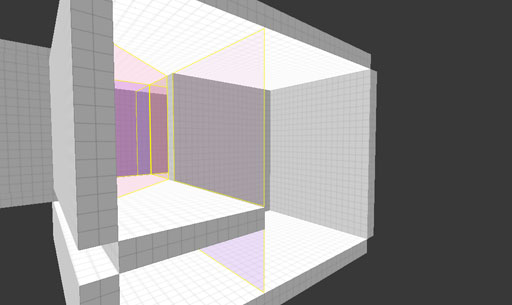
Of course, nothing's perfect. In adding that last hint brush, I've inadvertedly created a few new portals. The vertical hint plane created in the last step now extends beyond and across the hallway and down to the first floor.
From above, you can see it creates a small triangular portal volume in the middle.
So, I'll add a another hint plane here...
...which has an interesting result.
From the XY-view we can see some of the portal volumes.

Finally, unhiding the patches and detail brushes, you can see the difference that a little optimization makes.